Termite Damage to Drywall Repair
To repair termite damage to drywall, first confirm the termites are treated. Inspect for signs like hollow sounds and peeling paint. Use care when removing damaged drywall to protect nearby areas. After ensuring stability and dryness, patch small holes with self-adhesive mesh patches and spackling. For larger damage, replace the panel, ensuring a snug fit. Sand, prime, and paint for a seamless finish. Proper moisture control and regular inspections help prevent future infestations. Want more insights? Explore further.
Key Takeaways
- Identify termite damage by inspecting for hollow sounds and surface indicators like pinholes and peeling paint.
- Ensure termite treatment is complete before starting any drywall repair work.
- Carefully remove damaged drywall using a utility knife and maintain safety with goggles and gloves.
- Patch minor holes with self-adhesive mesh and apply spackling for a seamless finish.
- Prevent future damage by controlling moisture and maintaining wood-to-soil separation.
Quick Steps to Repair Termite Damage
Tackling termite damage requires a strategic approach to assure lasting repairs. First, verify termite treatment is complete before repairing drywall. Hiring a pest control professional is wise, using termiticides or bait stations to stop further activity.
Verify termite treatment completion before drywall repair; consult a pest control professional for effective management.
Treat the wall as active until inspection confirms otherwise, especially if signs like frass or mud tubes are present. Avoid unnecessary demolition; preserve nearby walls and wiring. Delay patching until the area is dry and stable. It’s crucial to note that termite pinholes can indicate significant underlying problems in wooden structures.
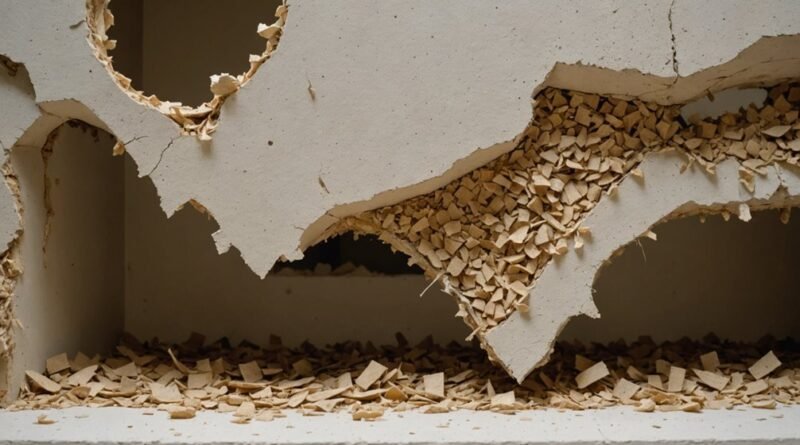
Carefully remove damaged drywall using a utility knife or saw, taking out only compromised sections unless the panel is structurally unsound. Protect adjacent areas by scoring before cutting. Bag and seal debris promptly.
Stabilize the repair site by removing loose materials and inspecting the framework for hidden damage. Allow the area to dry fully.
Identifying Termite Damage in Drywall
When you’re checking drywall for termite damage, pay attention to any soft spots that might indicate hidden issues. Tapping on the wall can help you recognize hollow sounds, suggesting termites have tunneled behind the surface. These clues are essential in catching an infestation early before it leads to more extensive structural damage. Additionally, look for pinholes in the drywall, as these can be mistaken for wear and tear but actually signal termite activity.
Detecting Soft Spots
Spotting termite damage in drywall starts with detecting soft spots. These areas feel weak or spongy under gentle pressure. Termites eat from the inside out, leaving the drywall surface intact while hollowing the material beneath. To identify these spots, try pressing with your finger or a screwdriver. If it sinks easily, you might’ve termite damage. Focus on:
- Baseboards and Frames: Termites often attack these edges first.
- Unusual Texture: Soft spots might feel like water damage, but paired with pinholes or peeling paint, termites are likely the culprit.
- Adjacent Framing: Weak areas near framing suggest potential hidden galleries.
Regular inspections can help catch infestations early, which is crucial for preventing extensive damage.
Check multiple spots since termites might localize damage in specific areas, leaving other sections untouched.
Recognizing Hollow Sounds
Ever wondered if that hollow sound when you tap your wall signals trouble? It could be a sign of termite damage. When termites consume wood behind the drywall, the structure absorbs less sound, causing that echo-like response.
To test this, lightly tap suspicious areas with a knuckle or screwdriver handle. Listen for the difference between solid and hollow sounds, especially near baseboards, windows, and corners.
A hollow sound indicates potential internal voids, suggesting termites are munching away. Check for other clues like pinholes, mud tubes, or frass near the base.
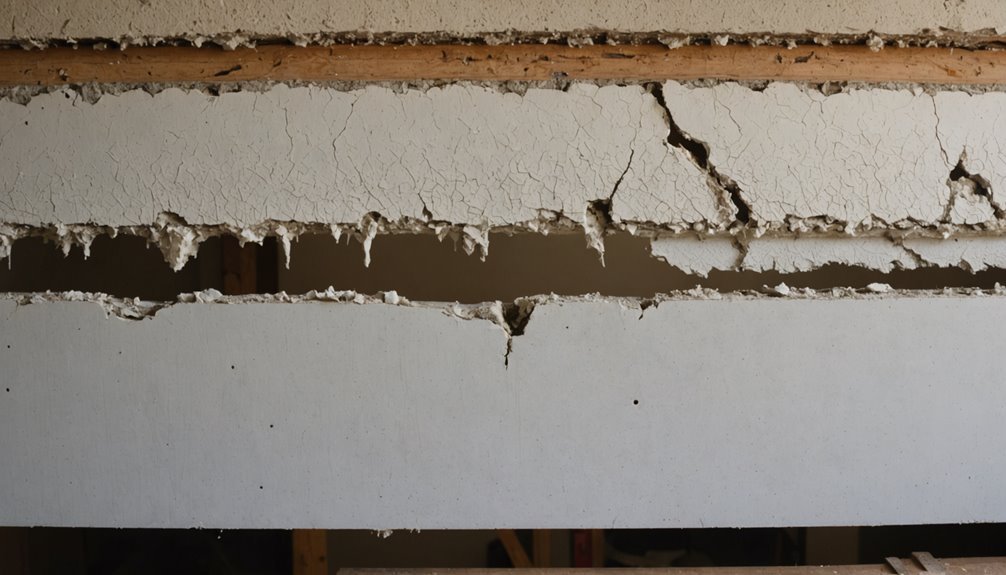
Assess Damage Severity
As you assess termite damage severity, start by carefully examining the surface indicators. Look for pin-sized holes, bubbling or peeling paint, and discoloration. These signs can reveal the extent of termite activity beneath the surface.
Perform sound and touch tests to further gauge the damage. Tap lightly for hollow sounds and press gently to check for crumbling. Listen for persistent clicking noises, which may indicate active termites.
Check location patterns to understand where termites might’ve entered or spread:
- Baseboards and window frames are common entry points.
- Wall corners and trim often show early signs like cracking.
- Moisture-prone areas increase the risk of hidden damage.
Document your findings to determine the scope and severity of the infestation.
Select Effective Termite Treatments
To effectively tackle termite infestations, start by identifying the sources of the problem, such as entry points or hidden galleries.
Once you’ve pinpointed these areas, choose treatments like liquid termiticides or borate-based solutions to block and eliminate termite activity.
Consider combining methods such as drilling and filling or foam applications for thorough control in hard-to-reach spaces.
Identify Infestation Sources
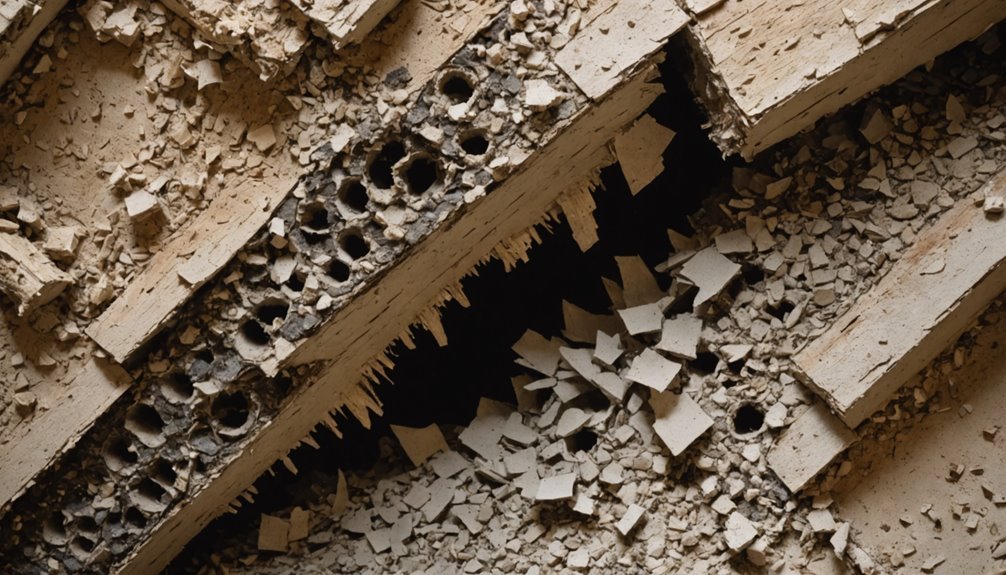
When identifying termite infestation sources, look for telltale signs like mud tubes along foundations or baseboards.
Hollow-sounding drywall or surfaces that give slightly when tapped can signal tunneling behind the wall. Blistered, bubbled, or peeling paint might indicate termites disrupting the finish layer.
Check for small exit holes, frass, or wood-colored dust near walls or outlets. Also, consider cracks in foundations and moisture sources.
To trace entry points, follow these steps:
- Inspect the perimeter for cracks and soil contact points.
- Check crawl spaces, basements, and attics for hidden galleries.
- Look around windows, doors, and utility penetrations for access points.
Confirm if damaged drywall is linked to infested wood behind the panel.
Implement Control Methods
Although termites can be incredibly destructive, effective control methods are available to tackle infestations. You can use termite-targeted foam insecticides to treat affected drywall areas.
Drill-and-fill applications place termiticide inside wall voids, spaced about 8 to 12 inches apart, keeping chemicals contained. Borate-based products are great for localized control and prevention.
For thorough elimination, consider professional help. Licensed pest control firms can apply soil-applied nonrepellent termiticides like Termidor or bait systems such as Sentricon to target colonies.
Moisture reduction is essential, so fix leaks and improve drainage to deter infestations. Always follow EPA guidelines and product labels for safe application.
After treatment, verify the area is dry before repairing any damage.
Treat the Termite Infestation First
Before tackling wall repairs, it’s important to treat the termite infestation thoroughly. Confirm termites are present by looking for indicators like mud tubes or blistered paint. You can’t just patch the surface; hidden activity might persist.
Here’s what to do:
- Seek Professional Help: Hire a licensed pest control expert if you find extensive damage. They can use liquid termiticides or bait stations effectively.
- Eradicate the Colony: It’s vital to eliminate the entire colony, not just visible termites. Drill-and-fill injections might be necessary for infested areas.
- Control Moisture: Fix leaky pipes and improve ventilation to prevent attracting termites again. Moisture management is key to avoiding future infestations.
Tools and Steps for Safe Drywall Removal
With the termites addressed, it’s time to focus on safely removing damaged drywall. Start by turning off electricity at the breaker and shutting off the water supply to the work area.
Clear the room of furniture and cover floors with drop cloths. Use a stud finder to mark utility locations.
Score the drywall with a utility knife along seams and edges. For tougher cuts, use a drywall saw or reciprocating saw.
Lift the drywall with a pry bar, removing screws with a screwdriver. Wear safety goggles, gloves, and a dust mask.
Cut drywall into 2- to 3-foot sections for easier handling. Collect debris in heavy-duty bags and use a vacuum for dust.
Inspect exposed areas for hidden damage.
Patch Minor Damage With Ease
Repairing minor termite damage to drywall can be straightforward with the right approach. Start by prepping the surface. Remove loose material, lightly sand the area, and clean with a damp cloth. Once dry, you’re ready to patch.
Prepping the surface involves removing loose material, sanding lightly, and cleaning with a damp cloth.
- Choose Your Patch Material: Self-adhesive mesh patches work well for small holes. Use spackling or lightweight joint compound to cover the area.
- Apply and Feather: Spread a thin coat of compound over the patch, extending beyond the edges. Feather the edges for a seamless blend.
- Dry and Sand: Let the compound dry completely, then sand until smooth. Repeat coats if needed for a flawless finish.
Finally, prime the area before painting to guarantee a consistent look.
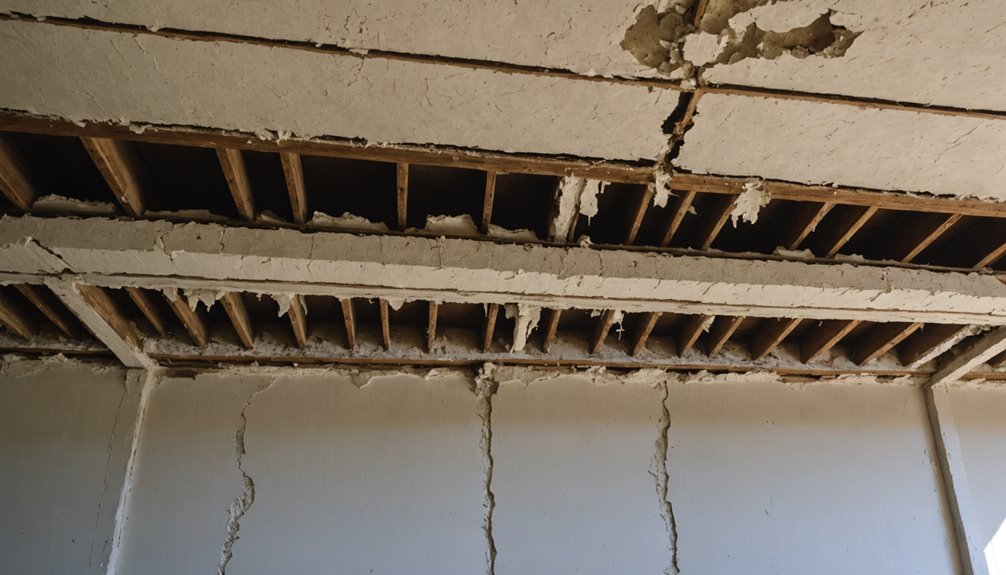
Replace Drywall Panels Properly
To efficiently replace drywall panels, start by cutting out the damaged area into a clean square or rectangle. Extend the cut to the center of the nearest studs or joists for solid support.
Use a stud finder to guarantee accurate cutting, especially on ceilings. Inspect the cavity for any rot or wires before proceeding.
Next, measure the opening’s dimensions and match the new panel’s thickness. Cut the replacement panel with a utility knife, ensuring a snug fit.
Use wood furring or backer boards for secure attachment, and fasten the panel with drywall screws spaced 6 to 8 inches apart. Set the screw heads slightly below the surface.
This prevents damage and guarantees a seamless shift when you move on to finishing.
Finish and Paint Repairs
To achieve a smooth finish after repairing termite damage, start by using a sanding block with grit 120 on the joint compound, followed by grit 220 for a flush surface.
Wipe away dust with a damp cloth before applying a stain-blocking primer to guarantee even paint absorption.
Finally, choose a matching paint color, test a small area, and apply thin, even layers for seamless blending with the existing wall.
Sanding for Smooth Finish
- Sanding Sequence: Begin with medium grit, then switch to fine grit for a smooth, paint-ready surface.
- Motion and Pressure: Use circular motions and maintain light, even pressure to avoid grooves.
- Inspection: Check for high spots or ridges with a bright light and your hand to confirm evenness.
Always clean the area thoroughly to remove dust before painting.
Matching Paint Blending
When tackling paint blending for repairs, precision is key to achieving a seamless finish. Start by taking a sample from the repaired wall for accurate color matching. A dime-size to quarter-size piece works best.
Store-matched paint, based on a physical sample, guarantees reliability over memory. Don’t forget to stir any existing paint thoroughly to prevent color shifts.
Prime the patched area with a dedicated drywall primer-sealer. Extend and feather the primer slightly beyond the patch to avoid harsh changes. Allow it to dry fully.
Match the sheen carefully, flat, eggshell, satin, or semi-gloss, as sheen differences stand out more than color mismatches.
Use a mini roller to blend paint outward with decreasing pressure. Test on an inconspicuous area and adjust as needed.
Keep Termites Away for Good
A few key strategies can help keep termites away for good and protect your home. First, focus on moisture control. Termites thrive in damp environments, so repair leaky pipes and use a dehumidifier in crawl spaces.
Focus on moisture control; repair leaks and use a dehumidifier to deter termites.
Second, guarantee wood-to-soil separation by maintaining at least six inches of clearance between siding and the ground.
Third, maintain exterior cleanliness and vegetation management. Remove rotting wood and keep shrubs trimmed back from siding to enhance airflow.
- Moisture Control: Direct water away from the foundation and repair leaks promptly.
- Wood-to-Soil Separation: Use concrete bases to keep wood components off the soil.
- Exterior Cleanup: Trim vegetation and remove dead wood to reduce hidden moisture.
Regular inspections and professional treatments further guarantee protection.
Frequently Asked Questions
How Long Does Termite Treatment Usually Take to Be Effective?
Termite treatment’s effectiveness varies by method. Liquid treatments often start working in 1–2 days and achieve full control in weeks to 3 months. Bait systems take longer, usually requiring weeks to months for complete colony elimination.
What Are the Signs of a Recurring Termite Infestation?
You’ll notice tiny pinholes in drywall, faint lines from tunneling, small frass piles, and mud tubes. Listen for clicking noises and look for swarmer wings. Check for discolored drywall and sagging or buckling surfaces.
Can Termite Damage Affect Electrical Wiring?
Yes, termite damage can affect electrical wiring. They chew through insulation, leading to exposed wires, short circuits, and fire risks. Routine inspections and moisture control help prevent these hazards. Act promptly if you notice electrical issues.
Are There Eco-Friendly Termite Control Options Available?
Yes, you can choose eco-friendly termite control options. Use heat, microwave, or cold treatments. Try beneficial nematodes, entomopathogenic fungi, or essential oils. Consider boric acid, diatomaceous earth, and preventive strategies like moisture control and sealing cracks.
How Do I Find a Reliable Pest Control Professional?
Check licenses, verify credentials, and review online ratings to find a reliable pest control professional. Ask for recommendations, compare estimates, and guarantee they use safe, effective methods. Always confirm warranties and read contracts thoroughly before hiring.
Conclusion
You’ve tackled termite damage with confidence! By identifying the damage and evaluating its severity, you took the right steps. You’ve treated the infestation, patched minor issues, and replaced panels where needed. With a fresh coat of paint, everything looks as good as new. Remember, keeping termites away is essential, so maintain regular checks and preventative measures. You’ve got the know-how to handle any future issues. Well done on restoring your space!